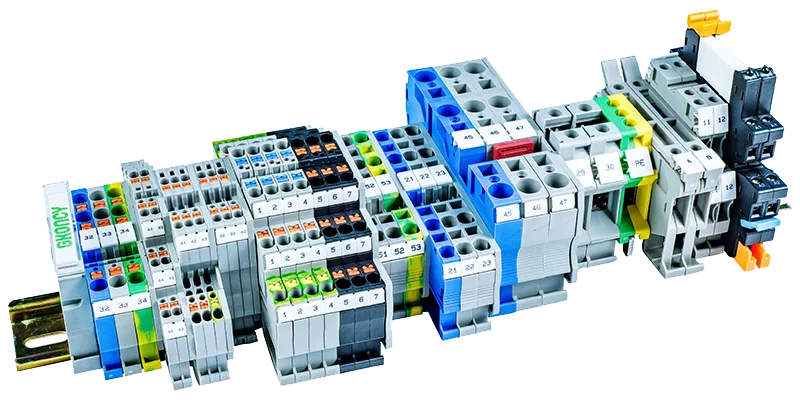
DIN-Rail terminal blocks are commonly used in industrial automation, electrical engineering, and building electrical systems, effectively providing stable connections between electrical devices. Installing DIN-Rail terminal blocks not only improves electrical system safety but also enhances system reliability and stability. However, proper installation is crucial to ensuring proper operation. This article will detail the installation steps and tips for DIN-Rail terminal blocks to help you complete the installation smoothly.

1.Preparation
- Before beginning DIN-Rail terminal block installation, ensure you have the following tools and materials:
- DIN-Rail terminal blocks
- Guide rails (typically 35mm wide standard rails)
- Installation tools (screwdrivers, pliers, electrician’s knife, etc.)
- Cables and wiring tools
- Measuring tools (such as rulers or calipers)
- Electrical tape
2.Pre-Installation Inspection
Before installation, check the following points:
- Check the terminal block specifications: Confirm that the selected terminal block meets the requirements of the electrical equipment and the operating voltage and current requirements.
- Check the rails: Confirm that the rail specifications match the terminal block dimensions. Typically, the standard DIN rail width is 35mm (DIN rail).
- Confirming Environmental Conditions: Ensure that the temperature, humidity, and other conditions in the installation environment are suitable for the terminal block.
3.Installing the DIN Rail
The first step in installing a DIN rail terminal block is to install the DIN rail. The following are the steps for installing the DIN rail:
- Selecting a Mounting Location: Determine the mounting location for the DIN rail, typically within the electrical cabinet. Ensure the location is spacious and convenient for subsequent installation and operation.
- Securing the DIN Rail: Secure the DIN rail in place using screws or special clamps. Ensure the rail is securely and levelly installed to prevent loosening due to vibration or other factors.
- Checking the Levelness of the DIN Rail: Use a level to verify that the rail is installed straight to ensure the stability of the terminal block after installation.
4.Installing the Terminal Blocks
Once the DIN rail is installed, you can begin installing the DIN rail terminal block. The following are the steps for installing the terminal block:
- Check the Terminal Mounting Orientation: DIN rail terminal blocks typically have an identification surface; ensure that the front side faces outward during installation to facilitate subsequent wiring.
- Aligning the DIN Rail Notches: Align the back of the terminal block with the DIN Rail Notches. Many DIN-rail terminal blocks feature spring clips that push directly into the DIN-rail slots. Ensure the terminal is fully aligned with the DIN-rail slots to prevent loosening.
- Securing the Terminal: Some terminal blocks require screws to secure them to the DIN-rail, while others are automatically secured with spring clips. Use a screwdriver to secure the terminal according to the terminal design to prevent it from easily falling out.
5.Connecting the Cables
After installing the terminal blocks, you can begin connecting the cables. Follow these steps:
- Stripping the Cable: Use a utility knife to strip the cable jacket to expose a sufficient length of wire.
- Inserting the Terminal: Insert the exposed wire into the terminal’s connection hole. Ensure the wire is fully inserted into the terminal to prevent loose connections.
- Securing the Wire: Secure the wire securely to the terminal using the screw or pressure plate on the terminal. Tighten the screws with a screwdriver to ensure a secure connection and prevent vibration or other problems from causing loose connections.
- Checking the Connection: Check each connection point to ensure there are no loose connections or loose contacts. If any problems are found, reinstall the terminal immediately.
6.Safety Inspection and Testing
After installation is complete, a safety inspection and testing is crucial. Check the following:
- Check that all terminal connections are secure: Ensure that no terminals are loose and that the wiring is secure and reliable.
- Check that terminals are properly grounded: Ensure that all terminals are properly connected and grounded to prevent electrical failures.
- Electrical Testing: Perform an electrical test to verify that the circuit is functioning properly. Use a multimeter to check the electrical performance of each terminal to ensure there are no short circuits or poor contact.
7.Complete the Installation
After installation is complete, organize the electrical cabinet, including:
- Use electrical tape to organize cables to prevent exposure.
- Ensure the cabinet space is tidy for easy maintenance and access.
- Close the cabinet and secure all terminals and wiring.
Tips:
- Regular Inspection and Maintenance: Even after installation, the DIN-rail terminal blocks require regular inspection and maintenance to ensure the long-term stable operation of the electrical system.
- Selecting High-Quality Terminals: To improve system safety and stability, it is recommended to select DIN-rail terminal blocks from a high-quality brand to ensure reliability.
Conclusion
Proper installation of DIN-rail terminal blocks not only ensures the safe operation of electrical systems but also improves overall system efficiency. By understanding and following the above installation steps and tips, users can ensure a quality installation while significantly reducing the risk of electrical failures.
If you have further questions about the installation and application of DIN-rail terminal blocks, please contact our technical support team. GKONCY is committed to providing customers with personalized electrical products and high-quality technical support to help you build safer and more efficient electrical systems. Please contact us through our website or customer service for more customized options and services!
